 |
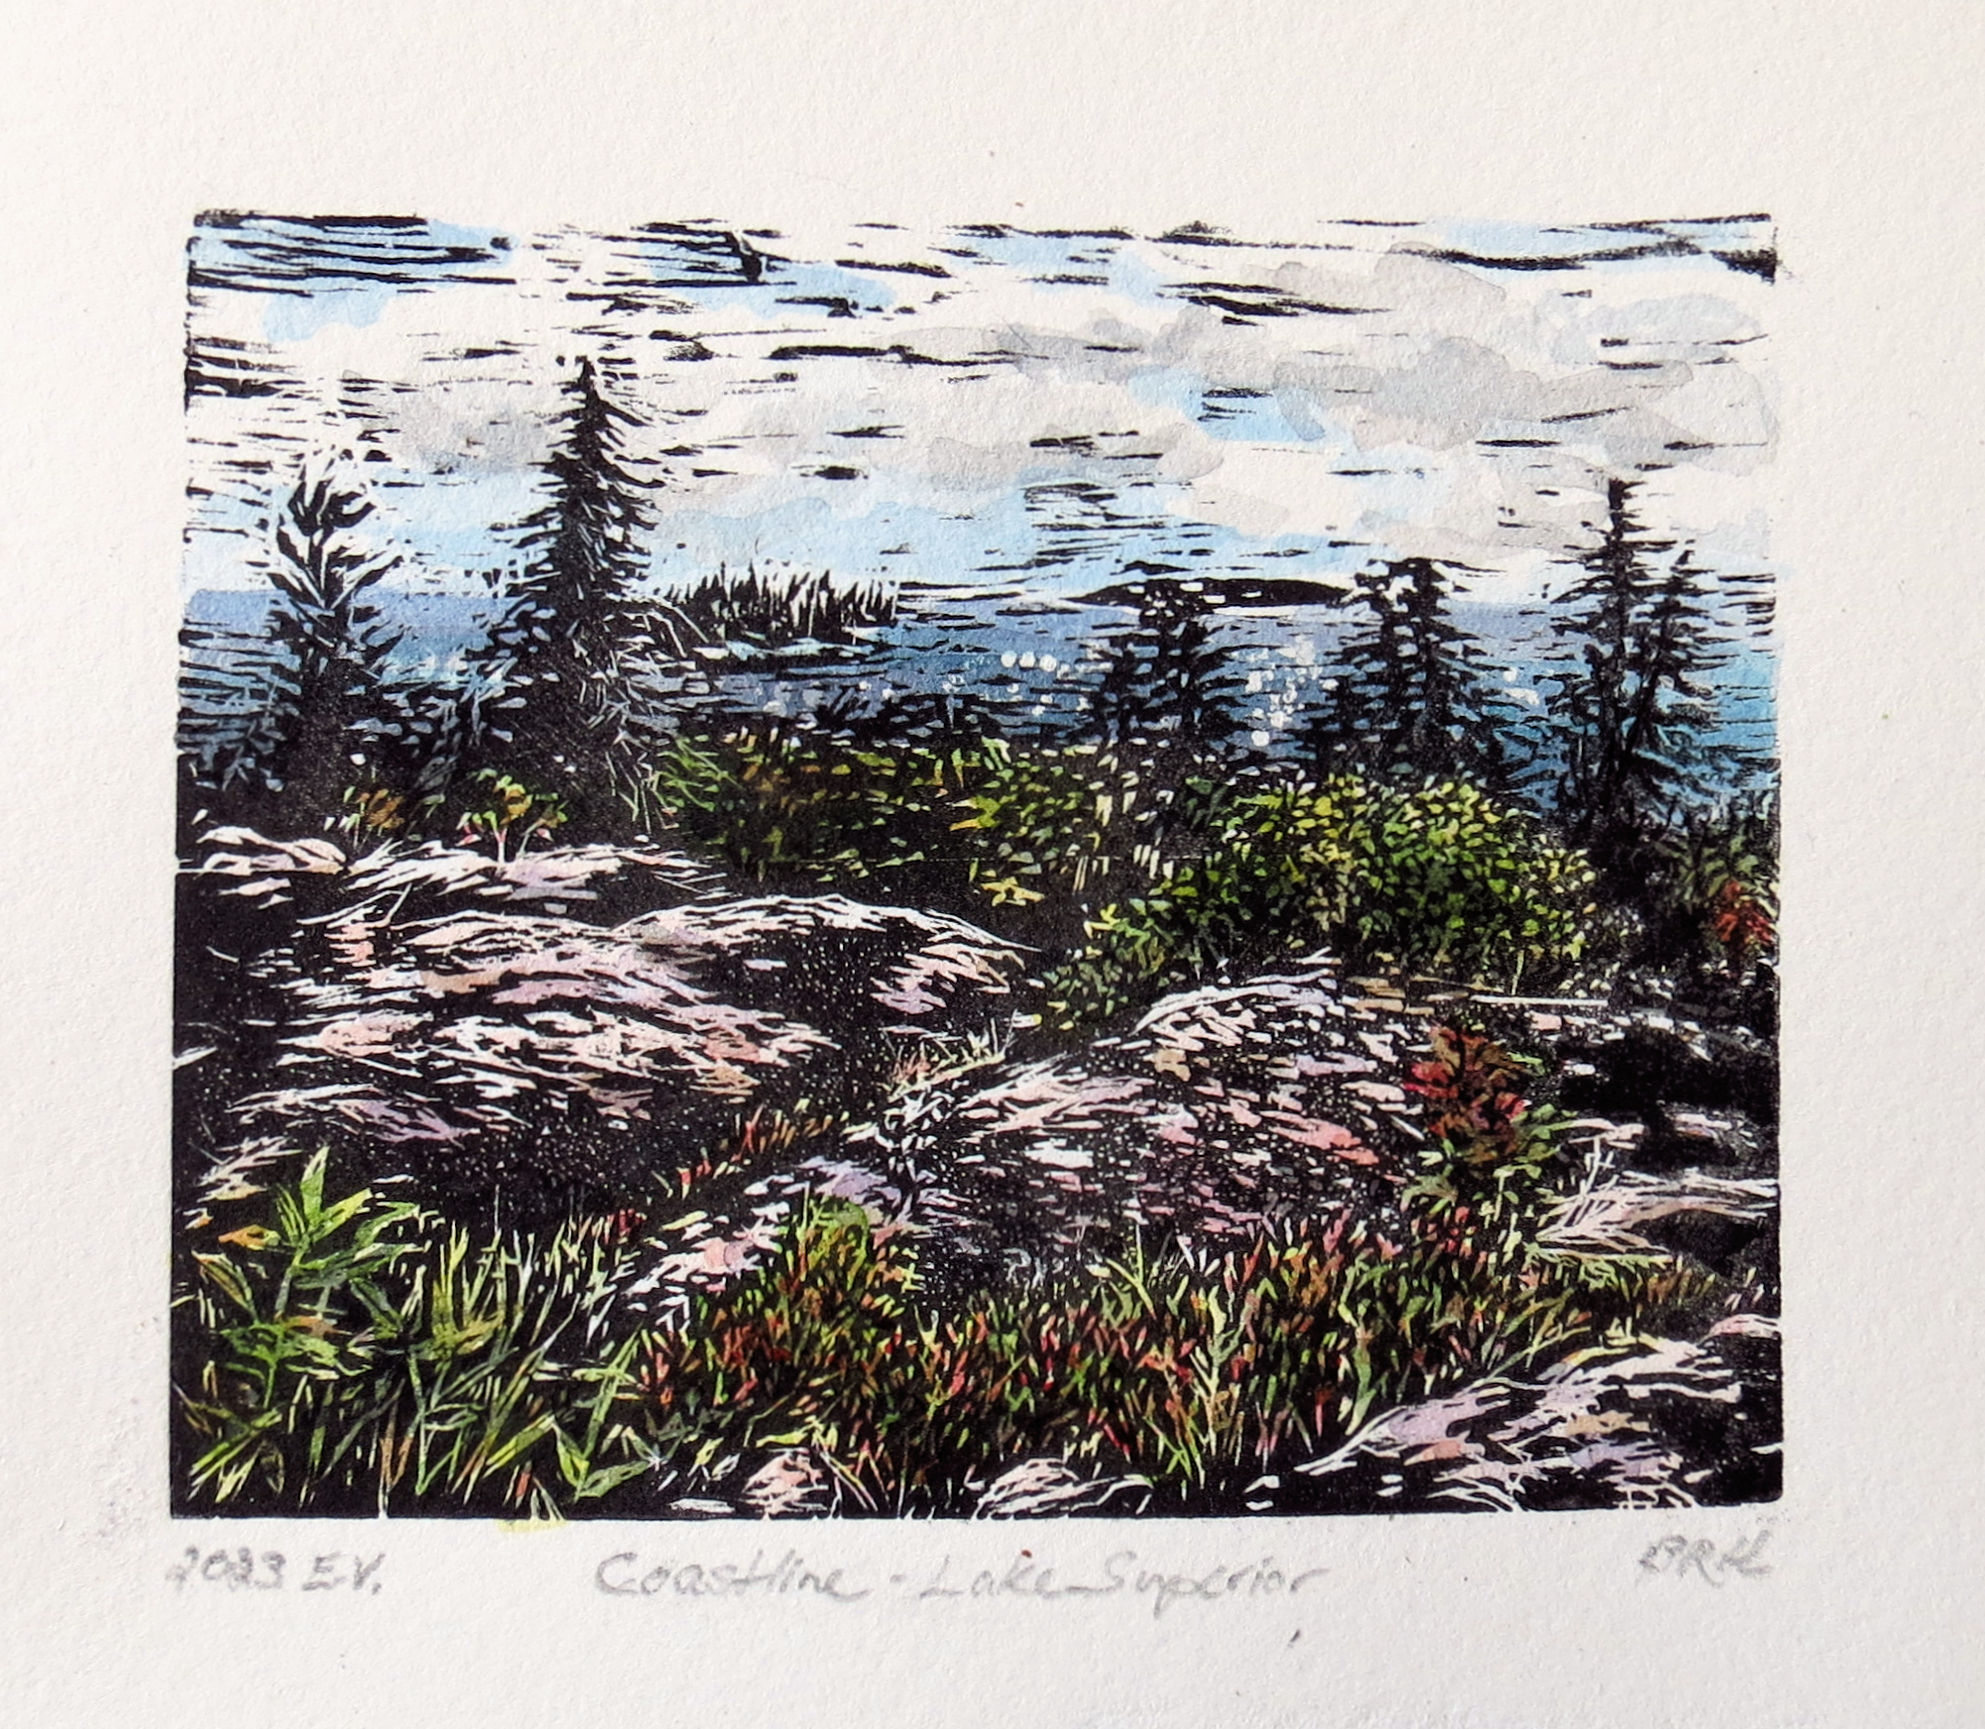
Coastline- Lake Superior wood engraving/hand-coloured open editon (varied) 2023 |
I had been wanting to try end-grain but encountered difficulty in sourcing it here in Canada. I was forced to put that earlier idea into the "do that later" mental files.
My printmaking friend had seen some recent small lino and resingrave work I showed him via email and he decided to help me obtain some traditional end-grain hardwood that he has used throughout his career as wood engraver, artist/illustrator and run a small gallery to showcase his work in his residence. In addition to the section of maple I was also sent an equal size piece of rare old boxwood.

I had the wood pieces cut to specific smaller size blocks by a local cabinet maker who had the recommended vertical bandsaw to cut with the grain (which is vertical orientation for the almost 3/4" thick blocks. The maple block I was sent is around 1/2" in height.
I was fortunate to have a small tabletop Blick etching press that allows enough clearance between the press bed and bottom of the top roller set at it's max height to accommodate paper and a smooth piece of hard paperboard.
I chose a landscape to sketch from a photo I had taken a couple of years back taken during a trip east to visit family. This is typical cambrian shield rocky outcrop that borders the north shore of Lake Superior on the Canadian side of the border, One will often find low bush blueberry shrubs, harebell flowers growing out of cracks in the rock. The rock also has a lot of lichens spreading across the ancient granite face. It is one of my favourite things about living here in the region where I do.
Below are a few photos that illustrate the creation of the print. They show a bit of the progression from after I had carved the block surface and through to the final colour version on paper. The first photo is my working set up and I place most of the tools nearby as well as the leather sandbag to help me keep the block stable while it is engraved. I also use a crocker sharpener system with light mineral oil and an arkansas oil stone to keep the tool tips nice and sharp. I will give a particular tool I plan to use a quick pass back and forth across the oil stone and it makes cutting into the wood surface less difficult to cut.
For the hand-colour element again I introduced watercolour with small fine tip watercolour brushes.


No comments:
Post a Comment